Friday, November 24, 2017

A Mixed Media Collaboration

Hi friends, I have a fun collaboration for you today! As a member of Ann Butler's Design team we were given a chance to work with Rita Barakat products and Lisa Marie Jimenez products!

So excited to work with both of these great products and you will see why soon!


I choose to work on a 12" X 12" base. I started by covering the front of the board with a piece of card stock. I added this by applying Matte medium and letting it dry overnight. While it was drying I choose one of Rita's stencils from the  "So you say you can't draw" collection. 


I traced the stencil and connected the lines. 


I added some color using colored pencils and she was ready to be adhered to the base using matte medium. I let it dry overnight. Now it was time to play!


I just started to lay down colors using a damp brush and Ann Butler inks. I added some of Lisa Marie Jimenez Colorique to the mix and it was like a match made in heaven!


I had so much fun laying color down that her hair must have changed color at least five times!!!

I added inks over her face and gave her more definition and highlights. I love the combinations of Ann Butler inks and Lisa Marie Jimenez Colorique, they came together beautifully.

Just look at her face! Isn't she dreamy?


I added some modeling paste and added ink over the top. I colored the feathers with Ann's ink Limelight, Berry and Colorique Turquoise Mountain. The Colorique Poppy gave me a rusty feel that I loved and I can't wait to do more with it. With Rita's stencil it made this girl so easy to do! I used Colorique to add color to the little wooden hearts.

So I had a paint, paint, paint, squirrel moment!

I pulled out some buttons I use for mixed media and had to try the Colorique on them and LOOK!

I used the Verdigris and Poppy!


So I will be playing with this more!!!!

One last look...............


I hope you enjoyed my project and the new products that were introduced. I sure did! Make sure you head over to Rita's and Lisa's blog to see what they have come up with!

Ann Butler
Rita Barakat
Lisa Marie Jimenez

Thanks for stopping by!

Thursday, November 9, 2017

Stunning Napkin Rings

I am up on Expo International Blog today and I am showing you how to make some stunning napkin rings for the holidays!

These can be for Thanksgiving and Christmas and perhaps New Years Eve!

Very simple to make!


If you are interested in learning how to make these stunning napkin rings you can go HERE!
Monday, October 30, 2017

Mixed Media All Occasion Card

This card is so fun to create and it comes together so fast!

The beautiful flowers are from Little Birdie Crafts and they are stunning!

I am up on Little Birdie's Blog today and would love for you to come and take a look and find out how I made this beauty! Go HERE!


Thanks for stopping by!
Wednesday, October 18, 2017

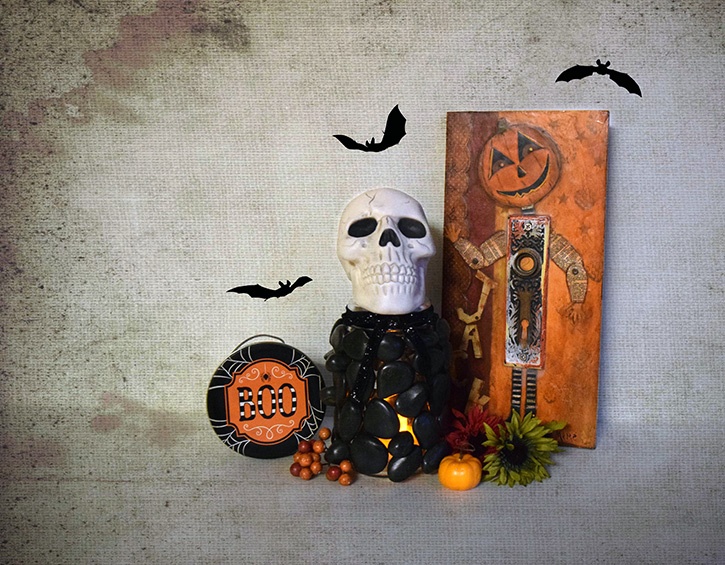
Creepy Skull Jar

Learn how to make a creepy skull jar that lights up with Glue Dots®!

It's CREEPY COOL!

Want to learn? Go HERE!

glue-dots-halloween-skull-jar-made-by-donna-budzynski.jpg

Thanks for stopping by!
Tuesday, October 17, 2017

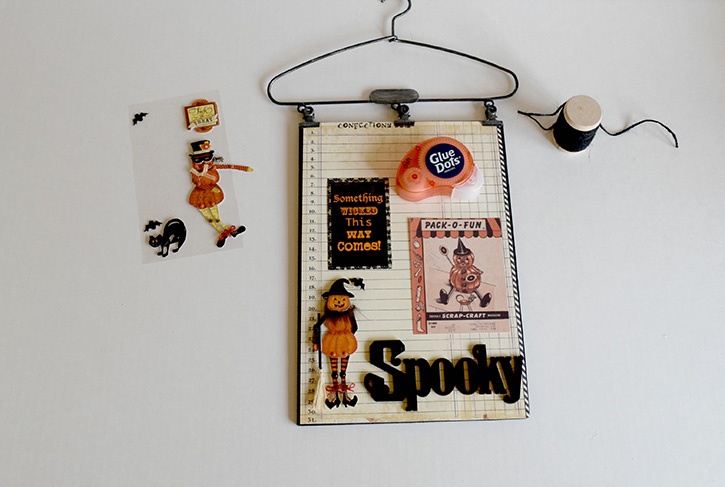
Spooky Halloween Decor

I am up on Glue Dots® and would love to share how to make this adorable spooky banner with you!

Go HERE to learn!

glue-dots-halloween-spooky-sign-pieces-arranged-on-board.jpg

Thanks for stopping by!
Friday, October 13, 2017

Halloween Treat Cups!


Are you having a party? Do you have special little one to give treats too? 

These Halloween Treat Cups are perfect!

Fun and easy when using Little Birdie Crafts Chipboard!

Head over to Little Birdie Crafts Blog HERE and take a look!

Thanks for stopping by!
Thursday, October 12, 2017

Fall Harvest Wine Bag!

I am so excited to be up on the Expo International Blog today and I would love for you to come over and take a look!

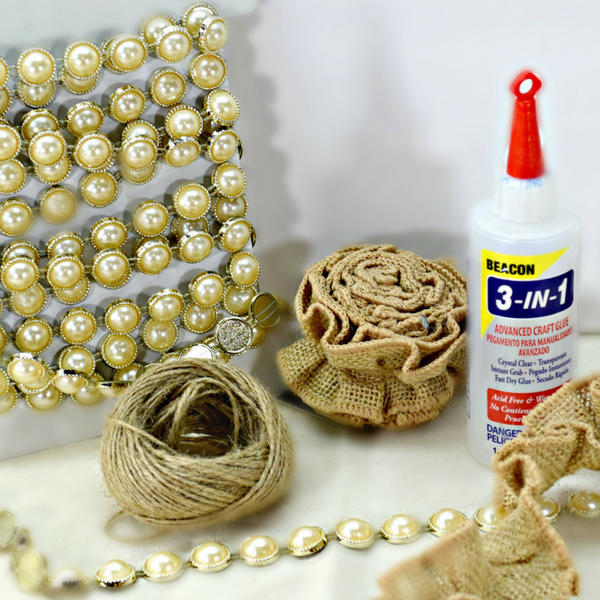
So easy to take a burlap bag and turn it into a beautiful bag!


 Come and find out how to make this wine bag HERE.


Thanks for stopping by!

Monday, October 9, 2017

Mummy Punch Bowl and Wiggly Eye Glasses for Halloween

I was asked by Glue Dots® to come up with a project using products from Walmart and Glue Dots® that Walmart carries. Halloween theme!

Oh I can do that!

Here is what I came up with!


Want to learn how to make your own? 

Go HERE!


Friday, October 6, 2017

Black Cat Halloween Decor!

I have a super fun Halloween project up on the Little Birdie Crafts blog!

This Black Cat Spooky Halloween piece has just the right amount of scare!

Can you imagine coming down a dark hallway and catching this out of the side of your eye?

Ooooo spooky!

For details on this project head over to Little Birdie Crafts blog HERE!


Thanks for stopping by!
Wednesday, October 4, 2017

In the mood for Halloween?


So am I!

I have made the
cutest punch bowl and wiggle eyed drink glasses for Glue Dots®!

You need to go take a peek!

So much ghoulish fun for your Halloween table!

Do you want to learn how? Go HERE!


Now go and scare up some fun!!!!

Thanks for stopping by!
Monday, October 2, 2017

Halloween Treat Bags

Hello friends!

Guess who is on the Little Birdie Crafts blog? Yes it is me!

I have another Halloween idea that is fun, fast and easy! Kid friendly!

Little Birdie Crafts Make it so easy with the fabulous chipboard they have to work with! I love all of there chipboard cutouts!

Head on over to get the detail! Go HERE!


Thanks for stopping by!
Friday, September 8, 2017

Child's Name Plaque Decor'

Does your baby need a Name plaque?

Here is a new and easy way to make one for that special little one. I am up on Expo International Blog today and have created a easy name plaque and I would love for you to hop over and take a look.


Have you ever thought of using appliques on a name plaque? Well here is what I did and if you want to learn how go HERE!

Thanks for stopping by!
Tuesday, July 25, 2017

Heartfelt Journal -

This month for Eileen Hull inspiration team we were asked to create using Eileen's Heartfelt collection. This collection has been a top seller and has been very hard to keep in stores. 

YES, it is that good! This journal can be anything you would like it to be, scrapbook, journal, junk journal and a calendar. It can be crafted and decorated so many ways and if you have been following along you will see so many different designs.

For mine I this time I chose to use Eileen's new paper pad. It is a 6' X 12" double sided, with quality card stock. She has 24 designs, so you get 4 sheets of each design. What does she call it? That is simple it was made to go with the Heartfelt dies, so she simply named it Heartfelt! So perfect!

What I did not realize is that there was a reason behind it. I found out after I had worked with her paper that the houses represent the House Die and the flowers match her flower dies! Birds and butterflies were also included in the designing of the paper! We can't forget Scotty, he is included also!
That Eileen is one smart cookie!

I love this phrase and I thought it was appropriate for the cover of this journal!

"An idea is just a dream
                       until you write it down"

I often wake in the night with a thought or idea and need to write it down or I will forget, anyone else?

I just stamped out my phrase using individual letters onto Eileen's grid paper with flowers.
Added some of the stripe paper and the houses along the bottom.

I made a tassel as a bookmark, tassels are everywhere these days.


My inside page I used the pocket that is included it the paper pad, a little fussy cutting and it was ready to adhere onto the inside cover. I love the black and white flower paper! Little added bonus to doodle on! So FUN!


For my pages I used white card stock, cut to size. I wanted most of my pages to be blank to write or draw my ideas onto the paper.

I found some cute mini clothespins that were the perfect color to add to the pages! So CUTE!

My back cover is covered with the same flower paper and I used the envelope that is included in the paper pad and also the journal cards.

On the inside pages I added just a strip of paper here and there just for added color. Still plenty of room to add my drawings or ideas!


Thanks so much for stopping by! I hope you will head over to Eileen's Blog and see all the beautiful projects the Design Team have been making, you will be glad you did!


Monday, July 24, 2017

Guest Post

I am a guest over at Craft's and Coffee!

Sharon is having a Christmas in July week with plenty of Christmas crafts to get you thinking about creating some beautiful decor! 

I hope you come over and see what I have made with some BEAUTIFUL trim from Expo International and the STYROFOAM Brand Foam Cones.

Sneak Peek!


You will have to go see the finished product at Crafts and Coffee!
Thursday, July 20, 2017

Canvas Gift Bags

Hello Friends!

I am up on the Little Birdie Crafts blog and I have two super cute gift bags I have made!

I mean really cute! I LOVE the way these turned out! Wanna See?

All the details on how to make these and what you will need is HERE!


Head on over to the Little Birdie blog to see how to make these beauties!

Thanks for stopping by!

Tuesday, July 18, 2017

Rustic Wedding Decor Using Glue Dots®

Do you need some inspiration for a rustic wedding?

We have come up with a low price point piece of decor for your wedding tables!

Just invite your girlfriends over and you could have these done for the tables in no time and
have fun doing them!

Check HERE for all the details!


Thanks for stopping by!
Thursday, July 13, 2017

Delightful Children's Apron

I am up on Expo International Blog today and have a special little guest.

I have made my granddaughter a lovely apron for when she is helping in the kitchen or doing crafts!

If you would like to see how I made it, head over HERE!


Thanks for stopping by!

Friday, June 30, 2017

Rusty Gear Decor

Hello Friends!

I am up on the Little Birdie blog and I have made a Rusty gear decor piece. I love grungy, rusty decor. This piece was fun to make.

I would love if you would go have a look! For all the details and supplies need head over to the blog HERE!


 I would love for you to head over and find out how to make this rusty piece!

Thanks for stopping by!

Tuesday, June 27, 2017

Stampotique + Eileen Hull Dies = Fabulous Fun!

Hello!

This month Eileen Hull's team is collaborating with Stampotique and both teams have been creating some pretty spectacular projects! I encourage you to check out the June posts on Eileen's blog and the Stampotique blog too!


I have two projects for you today! I am trying to make up for missed time! I have been out of commission since April. I ended up in the hospital in ICU, I had sepsis and it was quite serious. The reason I got that is I had pneumonia and did not know it. I felt absolutely fine. But obviously I was not!

Anyway....I am back and feeling so much better!

Let's get back to the projects!

My first project, my choice was to use Eileen Hull/Sizzix Basket die and I paired it with Stampotique stamp - Kassa's Bloom.


2. Stamp Kassa's Bloom randomly on mat board using Archival ink.


3. Using colored pencils I begin to color.


4. I started with a light yellow.


5. Added some darker tone.


6. Added a little red color. Just a splash.


7. Here is the Magic! I pulled out my Color Box Blends by Eileen Hull. Just two colors, Sunshine and     Wildberry. A paint brush and some water.

Wait for it............................................


BAM! I added Sunshine over the top of the flowers and the background. I then added some Wildberry for some pop! Splattered the Wildberry over the top of it.

LOVE, Love, love the way it looks!


Finish by putting it together using your favorite adhesive and you have a lovely basket to display. This would make beautiful candy dishes on a picnic table or do these in wedding colors as party favors! Oh the possibilities!


My second project is made with Eileen's Heartfelt Journal cover. It makes for a fantastic base for making small art boards.


First I cut journal cover out, along with the book plate that goes along with the journal die. I stamped out my images from Stampotique. Some a few times, I am going to layer some pieces.


Stampotique stamps I used are as follows!
Mela 
I stamped images on white card stock using Ranger Jet Black Archival ink.


I covered journal base with paper from 7gypsies. The door paper is also from 7gypsies.


Round all corners with corner rounder.


Sand to distress paper. This is optional!


Using ColorBox Blends by Eileen Hull - Nutmeg, blend ink to distress card stock even more.
I love this look!


I stamped Mela right onto distressed card stock for the base layer of her. Pull out colored pencils and start coloring.


Here are the different parts of Mela that I colored. I did color 2 dresses.


I adhered on the door and parts of Mela. I added first layer of dress and added another layer on top of first dress to get a flowing motion. You can't tell in 1st photo, in the second photo you can see it it lifted off the base. I added a hat onto Mela made from one of the tops of a house. I added some rub-ons from 7 gypsies. I stamped the book plate with Stampotique Upholstered  stamp along with the verse stamp. I did some extra shading around the door and Mela and now I have a great little art piece to remind me to just be ME!


Thank you so much for stopping by. I know it has been a long time, but I am BACK! YAY!

Please make sure you check out Eileen's Blog to see what the other Design Team Members have made!