Tuesday, September 20, 2016

Halloween Treat Holders!

It's almost time for Trick or Treaters!

So I have made some cute treat holders using the NEW Twist and Style tool from Eileen Hull. I used a few of Eileen's die made by Sizzix and I was off getting my Halloween treat holders made.


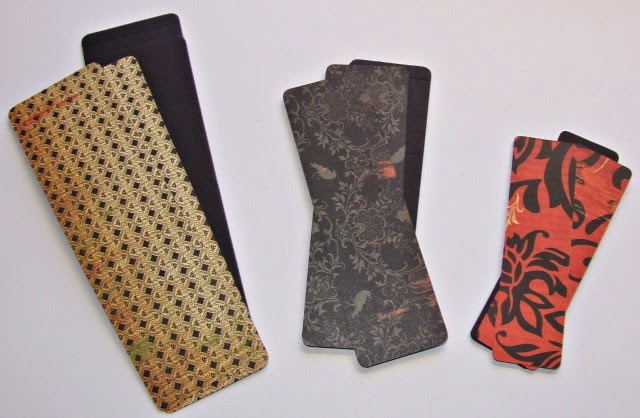
First photo is the finished holder using the Twist & Style tool and can you guess what Eileen Hull die? It is the canister die! Just didn't use the cover! Easy fun!


To make this one you will need:

Canister Die
Twist & Style tool
Mat board
Paint
DecoArt Media Modeling paste 
Stencil
Ephemera-Tim Holtz
Distress Ink
Feathers
Also shown is garland made from Eileen Hull Garland die


Cut Mat Board out using Eileen Hull Canister die
Adhere together using adhesive of your choice
Paint Canister 
I distress inked just a bit
I used a stencil and DecoArt Media Modeling paste mixed with black paint and stenciled pattern onto canister and let dry.
Using the Twist & Style tool I twisted some wire together
Punched holes on two opposite sides of Canister and put wire through holes and curled
Decorate your canister to your liking!
Easy!!!

Next I have a Hot Air Balloon using the Twist & Style tool and Eileen Hull Cubes die die.

 For this one you will need:

Extra Large Die Box Cubes-3D
Mat Board
Wire
Twist & Style tool
Adhesive
Light Bulb
DecoArt Black Mister
Paper of choice-I used Tim Holtz

Gather all materials


Spray light bulb and large box using Deco Art Black Mister

It will take a couple coats on the light bulb

Punch holes in each corer of the largest block
Twist you wire and insert into holes
Twist wire into place
At neck of bulb I tied some netting to hold in place and then brought wire up and around bulb.
Twist wires together at top.
Embellish as you wish and fill with candy or a witch!


These are so easy and fun you could have the boxes made and have a decorating party. Put a bunch of embellishments out on the table with adhesive and what a fun night to be had by all!

What will you be putting in your Treat holders?

Make sure you check out Eileen's Blog to see what the rest of the DT has made!

Live, Love and Art!

Friday, September 9, 2016

Gnome Home with Makin's Clay


Welcome!

Have you ever worked with air dry clay? 

No baking required to make this cute little home to display! Easy enough to do in steps, so that you don't get over whelmed.

This is made using Makin's Clay®. While I feel that I am still new to this clay, I have been working with it for a bit and I am trying new things. I wanted to do a bit more free hand sculpting and creating. So this is what I have come up with a cute little Gnome home.


Picture this....I started with a small cardboard box and a piece of driftwood I found. I started to work Makin's Clay® around the box and used the clay to extend what looks like part of the wood up onto the house.

I rolled little stones and added some brick to the house. And where would a Gnome home be without mushrooms? So of course I made 3! I loved making those mushrooms and you will be seeing more of them! I think with some cute little faces!!!

I made the door and window and then the roof. The roof is simply just rectangles layered. All is very simple if you just break it down into a shape.

This is what a package of  Makin's Clay® looks like. 

Here is the home before paint and before the mushrooms were attached or the moss added. If you look you see everything is just a shape added to another shape. House is a rectangle, stones are ovals. Bricks and roof rectangles. Super easy. 

Believe it or not I find it easier to sculpt than to draw!

Next I used Deco Art Americana paints and also some of the Deco Art Media acrylic paints to paint my home. I did use Deco Art Texture Sand Medium to make the home look like it had a stucco affect!


 To adhere the mushrooms I use Beacon Power-Tac adhesive, this is a very strong adhesive and I am really liking the strong bond. I used Beacon 3 in 1 Adhesive to adhere the moss onto the piece.

I hope you will give Makin's Clay® a try and find out how easy it is to use!

This is a artsy fartsy shot of the Gnome home. I think maybe a bit to much blur...What do you think?


Thanks for stopping by and I would love to know what you think!!!

Let's Live, Love and Art!
Wednesday, September 7, 2016

Halloween Fun!

This is a re-post from my old blog - Memes Art Place

Halloween ATB FUN!

Hope your having a wonderful spooky fall!

It is my week for the Eileen Inspiration team and I am super excited to share my spooky fun!

Sooooo much fun with boxes! Who Knew?

Eileen Hull Knew, That's WHO!

There is so much you can do with These boxes, it is AMAZING! Go and check Eileen's blog and you can see so many ideas!

This is mine for this month's 
ART WITH A HEART CHALLENGE "Tricks and Treats" theme!

I started with one idea in my head and it went completely the other way!
I guess my hands wanted to do one thing and my head another!
So I combined the two and this is what happened!


So I started with this spring and this piece I took off a dress form. I then used Creative Paperclay® and sculpted a cat head. So easy! Let that dry overnight.


So while my cat head was drying, I cut my ATB's using Eileen's Die #658984 called Blocks/Cubes 3D. I cut 2 of each size using Sizzix's Little Sizzles Mat board in black. Did you know they carry this Mat board in White, Black and Cream. Love This Mat board for so many projects. It is very sturdy!

 I then cut my papers for each size of the ATB's. Paper's are from Cosmo Cricket "Haunted Line".
I have to say this line is old, but still to this date
 MY ABSOLUTE FAVORITE HALLOWEEN LINE!

I adhered each of the papers to the ATB's. Then I proceeded to put the blocks together.

I started to play around with the blocks, then decided on paint colors and started to decorate the ATB's.

I painted my cats head and varnished it and attached the spring with E6000.
Added the cat to the smallest block.


Here you can see how I added Studio 490 crackled texture paste by Wendy Vecchi. I added her Fern Green Archival ink to the paste to add color to it. I just spread it here and there, no special technique here. I added some burnt orange acrylic paint here and there also. When all pastes and paints were dry I adhered the cubes together with Crafter's Pick "The Ultimate" glue.

Add your embellishments. I choose to add arms to the small ATB. This was done by cutting a small slit into the side of the box and sliding the arms into the box. I used some of Tim Holtz's embellishment to finish off the piece.


 I love the way it turned out!


This picture I had to play with and add some spookiness to it!


NOW I have a super easy bonus project! Super fun for the kids to do, with your help!


Cut out all kinds of Blocks out of the Block/Cube 3D die.


Punch out a pumpkin face out and add tissue paper to the inside.


 Put battery operated candles inside and stack or place around the house! So cute!

Super simple!

Now it is your turn!


Sunday, September 4, 2016

Vintage Lunch Box featuring Graphic 45-ABC Primer

 Hi all.......

This is a project that I did a while back that never really had been given a photo shoot! I felt it was time to share this AWESOME project!

I received a vintage red lunchbox from a friend and it sat on the shelf until Graphic 45 debuted ABC Primer! It was vintage and it had red and it was perfect for this old metal red lunch box!

I knew I wanted to make this something you could display and have it be useful too!

I just didn't quite know what to do, I sat and stared at it for a bit and fiddled with some of my do dads. It hit me...like a ton of bricks. I started to alter this very cool vintage red lunch box.


I added a handle on top and wheels (Tim Holtz pulley's) on the bottom. Now to start to build off of the foundation I just created. I started with the lid of the box and proceeded to the inside!


I wanted some of the worn vintage metal to show so I trimmed the paper so that you could still see the scratches and rusty goodness. I would love to hear all the stories this lunch box could tell. Did it belong to a girl or a boy? Maybe both, as they had to use a hand me down! 


 Oh boy did I have fun with the inside! I layered the papers to make it so inviting and vintage looking. I built a shelf to hold the scrapbook that was created to fit inside. On the left I added a strip of elastic so you could add report cards, drawings by just sticking them behind the elastic band. That way they are held in place and still looks great!


I love how the scrapbook fits right into the nook that was created for it! This would be adorable in a child's nursery/bedroom. Bonus small scrappy to tuck into the elastic band! Super cute to put the small school photos on K-12. Keepsake bonus!


Inside the scrapbook!

So many place to tuck and hide things. stitched paper. Oh the LOVE!

Vintage love!


 Just a fun photo to leave you with!


I sure hope you enjoy this redo of this great project and that it might have sparked a bit of creativity in that creative heart!

Let's Live, Love and Art!